Showing posts with label PICNICS. Show all posts

Friday, February 17, 2023

Salade de carrottes (Carrot Salad)

This has become one of my go-to salads instead of leaf lettuce. Sometimes I'm looking to pair a different flavor, and sometimes it's for the colour. Seasonally speaking, it's also a way of having a crunch salad when leaf lettuce isn't available.

1 lb carrots, peeled and grated
2 Tbsps minced chives or chopped green onion (15g)
2 Tbsps minced fresh parsley

Dressing
3 Tbsps. (36g) fine olive oil*
2 Tbsps. (27g) lemon juice
2 tsps. (14g) honey or maple syrup
1 tsp (7g) Dijon mustard
½ tsp ground cumin
¼ tsp salt
  1. In a large bowl combine the carrot, chive or green onion and parsley.
  2. To make the dressing, whisk all of the ingredients together in a small bowl until emulsified.
  3. Pour the dressing over the carrot mixture and toss until the carrots are evenly coated. 
  4. Allow the salad to marinate for at least 20 minutes before serving. Toss again before serving. 
*I don't usually talk about 'using only the best' of anything, but I did bother to point out that a fine extra-virgin olive oil would be choice in this instance. Regular olive oil is mainly for cooking and doesn't have much in the way of flavor. However, in a salad dressing of this kind you want to taste the olive oil, which is why a real cold-pressed, extra-virgin olive oil, preferably unfiltered, is best for a really tasty dressing but, if you don't have any, it'll be just fine.

Wednesday, May 5, 2021

Eggs in Marinade Oil

As many hardboiled eggs as will fit in your jar, covered with the marinade (at least 6)
2 cup extra virgin olive oil
¼ cup tomato paste
1 cup finely chopped parsley
½ to 1 head of garlic, peeled and minced
5 anchovies, minced 
  1. Boil the eggs to the hard-boiled stage (see Perfect Hard-Boiled Eggs). Allow the to cool completely, ideally immersed in water in the refrigerator, overnight.
  2. Peel the shells from the eggs.
  3. In a large jar with a lid, place the peeled eggs. 
  4. In a bowl, beat the tomato paste and oil together, then stir in the garlic and anchovies, and finally the parsley. Pour this concoction over the eggs.
  5. Screw on the lid and refrigerate overnight.
  6. Eat the eggs with the oil, preferably with some crusty bread. It's best to let the concoction come up to room temperature if the oil has congealed in the refrigerator, and to let the aroma blossom as it should when you serve it. Excellent with crusty bread, recommended with cheeses and fresh fruit.

Wednesday, November 16, 2016

Herbed Courgette Soup - good hot or cold

I've lifted this recipe pretty much exactly as it's written on the My Gourmet Connection Web site. The version below is merely my personal preference for the options provided in the original. It makes for a tasty soup to bring on a picnic since it's as good hot as it is, cold.

¼ cup (2oz/58gr) butter
1 cup onion, chopped
4 to 5 cloves garlic, minced
¼ cup flour
3½ cups chicken broth (veg stock for Vegetarian)
1½ lbs unpeeled any kind of summer squash - a mix of colours is nice
½ cup cream
1½ Tbsps lemon juice
1½ to 3 Tbsps chopped fresh tarragon OR 1 Tbsp dry
Salt and freshly ground black pepper

Note: Choose small to medium squash with tender skins and leave them unpeeled for both extra colour and nutritional value.
  1. Cut the squash into small (½") cubes and set aside.
  2. Melt the butter in a large saucepan over medium heat. Add the onion and sauté until soft and translucent, 3 to 5 minutes. Add the garlic and cook until fragrant, 1 minute longer.
  3. Add the flour to combine and, stirring continuously, cook until the flour is pale golden in colour, 3 to 4 minutes. 
  4. Slowly whisk in the chicken broth and continue whisking until the mixture is smooth and well blended.
  5. Add the squash and season with salt and pepper. (If using dry tarragon, add now and mix in). Cover and continue cooking, stirring occasionally, until the squash is tender, 12 to 15 minutes.
  6. Remove the soup from the heat and purée until smooth. Return the pot to the stove, stir in the cream and lemon juice and heat through, 1 to 2 minutes.
  7. Taste and adjust the seasoning, add the tarragon, ladle into serving bowls and top with a dollop of sour cream if desired.
  8. OR allow to cool completely and serve with freshly chopped tarragon sprinkled on top.

Sunday, April 3, 2011

Muffuletta Sandwich with Vegetarian Option

This is a delicious sandwich. I tried two versions using the vegetarian recipe, below - one true to this recipe, the other incorporating meats often used in muffuletta sandwiches (Italian mortadella and hot capicollo). The veggie sandwich turned out beautifully and, although the meat sandwich was good, it wasn't as good - I used less pesto and less tapenade in the meat sandwich and omitted the balsamic, which I think was my error. Anyway, I will try it again. I've included the meat as an option in the recipe, below. Essentially, there are loads of variations for this recipe, but the basic ingredient, as far as I can tell, that makes it a muffuletta is the olives - either tapenade or an olive salad etc.

1 small eggplant, cut lengthwise into 1⁄4" slices
2 small zucchini, cut lengthwise into 1⁄4" slices
1 large loaf ciabatta bread (recipe)
1⁄3 cup prepared pesto
1⁄3 cup prepared tapenade
2 jarred roasted red peppers, roughly diced (or more, don't be shy)
1⁄8 lb hot capicollo (optional)
1⁄8 lb Italian mortadella (optional)
1⁄4 lb mild provolone slices
2 Tbsps balsamic vinegar
  1. Heat grill pan or grill to medium-high heat. Brush eggplant and zucchini with olive oil, and grill 3 to 4 minutes per side, or until charred and softened, dribbling more olive oil as needed. Transfer to plate.
  2. Hollow the inside of the bread to make room for the filling. Spread pesto on one side of bread. Spread tapenade on other side of bread.
  3. Layer eggplant, zucchini, roasted red peppers, meat (if using) and provolone on one side of bread. Drizzle with balsamic vinegar (warning, this will make the bread soggy). Season with salt and pepper.

Sunday, July 4, 2010

Spiced Candied Pecans

These were a serious favourite at the picnic. I had no idea that they possessed such a narcotic effect! Neither dessert nor appetizers, they are great snacks to nibble on throughout the picnic. I think in particular for the Bocce picnic.

1/3 cup sugar
3/4 tsp. cayenne
1/2 tsp. salt
1/2 tsp. coriander
1/4 tsp. cinnamon
1/8 tsp. allspice
1 egg white
2 tsp. vegetable oil
2 cups shelled pecans
  1. Pre-heat oven to 300F.
  2. In a bowl, sugar, cayenne, salt, coriander, cinnamon, and allspice. Whisk in egg white and vegetable oil. Stir in pecan halves.
  3. Spread nuts in a single layer in an oiled non-stick 10- by 15-inch baking pan. Bake in a regular or convection oven, stirring occasionally, until nuts are crisp and lightly browned, 20 to 25 minutes.
  4. Let cool about 5 minutes, then use a wide spatula to loosen nuts from pan; cool completely. Serve or store airtight at room temperature up to 2 weeks

Saturday, July 3, 2010

My Birthday Picnic

So, I mentioned in my previous entry that Ben organized a lovely picnic potluck for my birthday. It was pretty busy, lots of people came and although the weather wasn't 100% great, we made the most of it. There definitely was a lot of food! I brought my Wonder Bread (the Miracle Boule) which was hugely popular, with soft chèvre and some lovely traditional French sausage we got at Granville Island; the Greek Loaf, which was equally popular (it disappeared first, but there was less of it); the Red Salad with Orange Vinaigrette, which was almost all eaten, and there was a lot of it; the Spiced Candied Pecans, which got rave reviews; and the Chèvre Pasta Salad, which got the least attention (I think it didn't have the same kind of visual impact and just looked like a pasta salad. Ben likes it a lot). So this is a really good test for picnic fare, and what is attractive and what's not.

Sunday, June 13, 2010

Chocolate Cakes in a Jar

A new picnic idea! I found a recipe for chocolate cake baked into a jar. At first I thought it must be some sort of fancy, special method, but after reading the recipe, I realize that it's just a chocolate cake batter baked in canning jars. I still have to check, but, like making cupcakes, the cooking time is probably a bit different.
What this means is that I can bake all sorts of things in jars and oven-proof containers that would fit in the picnic baskets. This is very exciting. It's like an extra wow factor to the picnics - baked in this way, they are specifically made just for YOUR picnic, my lord and lady, not just slopped into containers from a democratic mass.

Ten to twelve ½-pint canning jars

½ cup (4oz/114gr) butter, softened
1½ cups packed light brown sugar
2 large eggs
1 teaspoon pure vanilla extract
6 tablespoons unsweetened cocoa powder
1½ teaspoons baking soda
1/4 teaspoon salt
1½ cups sifted all purpose flour
2/3 cup crème fraîche
2/3 cup brewed coffee (I just use the morning’s leftover coffee)
  1. Preheat the oven to 350F. Place 10 to 12 ½-pint glass canning jars on a rimmed baking sheet, evenly arranged with space between them.
  2. To make the cakes, in a mixer fitted with a whisk attachment, beat the butter until smooth. Add the brown sugar and eggs and mix until fluffy, about 2 minutes. Add the vanilla, cocoa, baking soda, and salt and mix until combined. Add half of the flour, then half of the crème fraîche, and mix until combined. Repeat with the remaining flour and crème fraîche. Drizzle in the coffee and mix until smooth. The batter will be thin, like heavy cream.
  3. Pour the batter into the jars, filling them halfway. Bake until the tops of the cakes are firm to the touch, about 25 minutes.
  4. A topping is a good idea for presentation. Delicately sprinkle some powdered sugar and add a centre-piece like a nut or a piece of fruit or something extra-special like a candied flower. I was also wondering if a layer of some sort of clear jelly would look good and add a flavour dimension to the cake.


Thursday, May 27, 2010

Stages of a Picnic

I've decided to base by picnics on the stages of an Italian meal. I figure it's a good guideline since picnics are about several dishes, this sense of abundance and luxury. I've started devising a table to help me organise my thoughts around the idea.

Meal stage
Composition
Antipasto
Snacky bits that can either be eaten at the opening of the meal or any time from getting the basket to sitting to eat.
Primo
Sort of a light opener to the meal, like a cold soup such as Gazpacho, or a terrine.
Secondo
"second course", the main dish. I've been fascinated with cold savoury pies, which would fit in very well here.
Contorno
"side dish", may be a salad or cooked vegetables. A traditional menu features salad along with the main course. Easy for a picnic, since North Americans love their picnic salads. Or, also, a terrine here.
Formaggio e frutta
"cheese and fruits", the first dessert. Local cheeses may be part of the Antipasto orContorno as well. There are also my marinated chèvre balls! Ben made a good suggestion to add home-made crackers.
Dolce
"sweet", such as cakes and cookies
Caffè
I don't know yet if this is something I should include. I mean, I'd like to have wine or bubbly water or something, but coffee?
Digestivo
"digestives", liquors/liqueurs (grappa, amaro, limoncello, sambuca, nocino, sometimes referred to as ammazzacaffè ("coffee killer"). I need to find out about liquor permits. Is this even feasible for this kind of enterprise? There is also the possibility of non-alcoholic special drinks, like Rhubarb Water

Pique Nique ideas

Today I went to my second Check In meeting with Emotus Operandi to help me focus and organise my picnic business. It's awesome! I got some really good ideas, lots of confirmation (the group was really enthusiastic about what I'd accomplished and planned to do). I wasn't sure how to proceed, and got some really good feedback. So, for this summer, I've committed to giving 10 picnics to friends (and family if any come to visit). For the next Check In meeting, I've committed to come up with one sample menu (which doesn't need to be perfect), and start sourcing the actual picnic containers.
I've already established that I was going to start with three types of picnics:
1 - the Romantic
2 - the Cyclist
3 - the Bocce Game

The Romantic is a no-brainer: a picnic for 2, beautiful and elegant and sensual.

The Cyclist is ideal for Vancouver, with all the bike rental places for people who want to use the bike paths around the sea wall. I was thinking of using bike bags that fit onto modern bike racks, and the necessary containers to fit in them, and filling them with food. I just need to visit the bike rental shops to see what kinds of racks they have on their bikes to purchase the correct bags. All the customer needs is to attach the bag to the bike, and go.

The Bocce Game is for groups, sunny afternoons on the lawn, in the park, etc. It can be for families as well as for small parties. The basket and accoutrements would be similar to The Romantic, but not as refined.

When I was asked when I was going to start, my reply was 'next summer' and there was an outburst of 'why wait'? I'll tell you why! There are behind-the-scenes logistics that feel like a big deal, like food permits (health department) and licensing (vendor, alcohol?). Those are the biggies. And there's also the matter of what form this should start with - in association with other businesses, like Township 7 and bike shops etc, or out of my own location.

One of the interesting and encouraging things was Craig at the Check In who does the Under the Piano stuff, suggested that there could be a partnership between us - he is discovering that his clients are leaning towards couples' sessions, and they may like a romantic picnic afterwards. Cool!

Saturday, May 22, 2010

Structuring picnics

Picnics are usually multi-dish meals. I’ve been trying to bring together traditional North American picnic fare with a well-rounded summer menu. For example, potato salad – where does it fit in? I started to think about what actually constitutes a multi-dish meal, and shifted my thinking to multi-course meals, so instead of thinking about individual dishes and how they work together, giving myself a framework of types of courses that I could find dishes to fit in. I found on Wikipedia an entry on Italian eating traditions with a section on meal structures, which offered up this handy table.
Meal stage
Composition
Aperitivo
apéritif usually enjoyed as an appetizer before a large meal, may be
Antipasto
literally "before (the) meal", hot or cold appetizers
Primo
"first course", usually consists of a hot dish like pasta, risotto, gnocchi, polenta or soup.
Secondo
"second course", the main dish, usually fish or meat. Traditionally veal, pork and chicken are most commonly used, at least in the North, though beef has become more popular since World War II and wild game is found, particularly in Tuscany. Fish are generally caught locally.
Contorno
"side dish", may be a salad or cooked vegetables. A traditional menu features salad along with the main course.
Formaggio e frutta
"cheese and fruits", the first dessert. Local cheeses may be part of the Antipasto orContorno as well.
Dolce
"sweet", such as cakes and cookies
Caffè
coffee
Digestivo
"digestives", liquors/liqueurs (grappa, amaro, limoncello, sambuca, nocino, sometimes referred to as ammazzacaffè ("coffee killer")
Apart from the drinks (Aperitivo, Caffè, Digestivo) I think this is a good framework to work from. Which still leaves me wondering where the starchy potato salad fits into a balanced summer meal? I think I shall have to ask friends and relations who enjoy starches more than I do some questions to help me clarify this point, or leave off the potato salad all together.

Saturday, May 15, 2010

Marinated Chèvre

My sister Marie-Thérèse introduced me to chèvre from a goat farm near her house that was marinated in olive oil. They are yummy herby cheesy goodness! My plan is to make a new batch every month to always have some on hand. I'm guessing the olive oil preserves the cheese and keeps it from going bad... I hope!

3 oz soft chèvre cheese
2 bay leaves
2 tsps. black peppercorns
3 or more sprigs of fresh herbs
2 garlic cloves, peeled and lightly crushed
Zest from 1 lemon
olive oil to cover
  1. Prepare your herbs and spices to add as you put in chèvre balls.
  2. Put in a bay leaf on the bottom and the sprigs of thym along the edges of a sterilized jar.
  3. To make the cheese balls, use the teaspoon size from your measuring spoons, scoop up chèvre and shape into a ball in your hands. Pop into the jar. After every layer of balls, add a few spices and cover with olive oil. Continue until you reach the top of the jar, make sure the olive oil reaches the top of any food mater.
  4. Be sure there are no air bubbles, which could cause spoilage. You can slip a knife down the sides of the jar to help move the culprits.
  5. Seal and refrigerate. Let it marinate for a minimum of 12 hours.
  6. This will keep for about a month.

Sunday, May 9, 2010

Working in Wine Country

A co-worker, Heather Mitchell, also helps manage the Langley vineyard for Township 7 wines. She enlists volunteers who will work in the vines in exchange for wine. For a day's work, Ben and I both got 2 bottles of wine. Not a bad exchange, really. Sunshine, birds chirping, fresh air, physical work, a glass of wine with lunch, good company.
I mentioned to her my idea of having prepared picnic baskets: sell the food, rent out the baskets. She thought there might be an interesting partnership between the Township 7 tasting room and my idea. There are definite connexions. There's a picnic area at their tasting room/vineyard location in Langley, there is a client base in the area with lots of horse ranches and big houses, and there's the clientele who come to the wine tasting rooms. On top of that, the picnic baskets can have wine pairing suggestions, which is an added selling point for the wines and a draw for the baskets.
Logistically, how could it work?
-The location needs some sort of refrigeration for food.
-Would it be by advanced order only, or could I have some picnics ready and hope someone buys?
-Would the baskets and the dishes be rented or would there be a deposit ie: credit card number reimbursed once dishes are counted and accounted for?
-How many dishes? What kinds of containers?
-What kinds of 'grades' of picnics? Basic to Deluxe?

Tuesday, April 20, 2010

Chocolate-Stuffed Figs

These are surprising and delicious. I like to use bittersweet chocolate; when you bite into one there is the rich, bitter flavor of the chocolate that is transformed by the intense sweetness of the fruit. Apparently the best dried figs are obtained from October to March, the leather of the dried fruit should be moist and supple, which also means easier filling with chocolate. As a dessert, it entertains with the novelty, and it seduces with its flavour. When I say this, I'm not being metaphorical - whenever I have made these the reaction is always dramatic and positive.
To serve you can leave the fruit unadorned, or you can dip half of it in couverture chocolate, or you can cut into quarters for more dainty bites. I got this from the book Pure Chocolate by Fran Bigelow and Helen Siegel.
1 cup heavy cream
8 ounces chocolate, finely chopped (70%)
24 to 36 dried Calimyrna figs, depending on size
1 1/2 pounds chocolate (70%), tempered (optional)

NOTE: Have ready a 9-by-13-inch or quarter sheet pan lined with parchment.
  1. In a saucepan, heat the cream over medium-high heat just until it begins to boil. Remove from the heat. Add the finely chopped chocolate. Stir with a rubber spatula until smooth. Pour the mixture into a bowl, cover with plastic wrap touching the top to exclude all air, and let set for 6 to 8 hours at room temperature.
  2. Prepare the figs for stuffing by gently rolling them between your thumb and fingers to loosen the seeds and soften the flesh. Insert a wooden or metal skewer in the hole in the bottom of the fig and wiggle it to enlarge the hole slightly for stuffing.
  3. When the ganache is set, gently stir it with a rubber spatula a few times. Spoon some into a pastry bag fitted with a small round 1/4-inch tip.
  4. Hold each fig's stem gently between your index and middle fingers, using your thumb to support the plump fruit. Insert the tip of the pastry bag into the fig's bottom and gently squeeze, stuffing until the fig is plump and full of ganache. Do not worry about leaks in the fig's skin. They can be fixed later.
  5. Place the filled figs on a parchment-lined pan and allow them to set at room temperature for at least 2 hours. Using a sharp knife, scrape the excess filling from each fig's exterior. With a pair of sharp scissors, snip off the very tip of each stem, which is too tough to be eaten, before serving (if not dipping).
  6. The stuffed figs can be stored in a sealed container in the refrigerator. Remove and return to room temperature for eating -- or dipping, if desired.
  7. To dip, follow tempering and dipping instructions to get the chocolate at the correct crystalizing temperature (coming, at some point!). Holding the stuffed fig by the stem, dip the bottom half of each fig into the tempered chocolate. Place the dipped fruit on a parchment-lined pan and let the chocolate set. If you haven't already, with a pair of sharp scissors, snip off the very tip of each stem, which is too tough to be eaten, before serving.

Wednesday, April 7, 2010

Pic-nics to go


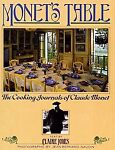
Today, I ran to the nearest bookstore (which happens to be a Chapters) and I could not find a new cookbook I wanted to read. So I picked one up that I had already leafed through. Monet's Table is a dreamy book, full of pictures of the house where Claude Monet lived with his family, and the gardens that surround it, focusing on the food culture in the home. Man, did they like their food, which is something I can completely appreciate. I also have an appreciation for wabi-sabi. The historical, homes and objects with lived histories, these appeal to me. Including old recipes. Some of the images in the book are images of old pages from the house-hold's cookbooks, handwritten.
The thing that most inspired me today - leafing through the book, looking at the pretty pictures and browsing the back of the book where the recipes are nestled - was the fête champêtre: social gatherings out of doors, and more specifically eating outdoors. Which made me think of the bistro.
How cool would it be to offer picnic lunches? Not just take-away, but actual picnics. There could be different grades of picnic, from Economy to Luxury, ie: Economy is just the food in tade-away containers, while Luxury would be a beautiful wicker basket (for example) with dishes and wine glasses and real cutlery and beautiful (but simple and easy to replace) rustic containers to store the food in. There could be a rental fee on the basket and/or a deposit. This summer I will work on developing picnic menus. How fun! Then, coming back from work, Ben and I can just pack the picnic and head out to the park to eat dinner. And what a wonderful thing to be able to offer that option to others through the bistro.
Notes: Would the customer have to order in advance or could I have a stock of picnic items they could pick-up on a whim?

Monday, April 5, 2010

PLACE HOLDERS H-R

HEALTH TIPS, HERB n SPICE BLENDS, HOLIDAYS, HOME REMEDIES, MAIN DISHES, MENU IDEAS, NIBBLIES, PASTA, PASTRIES, PICNICS, PIES (savory), PIES (sweet), PRESERVES, PUDDINGS, QUICHES, ROAST MEAT,